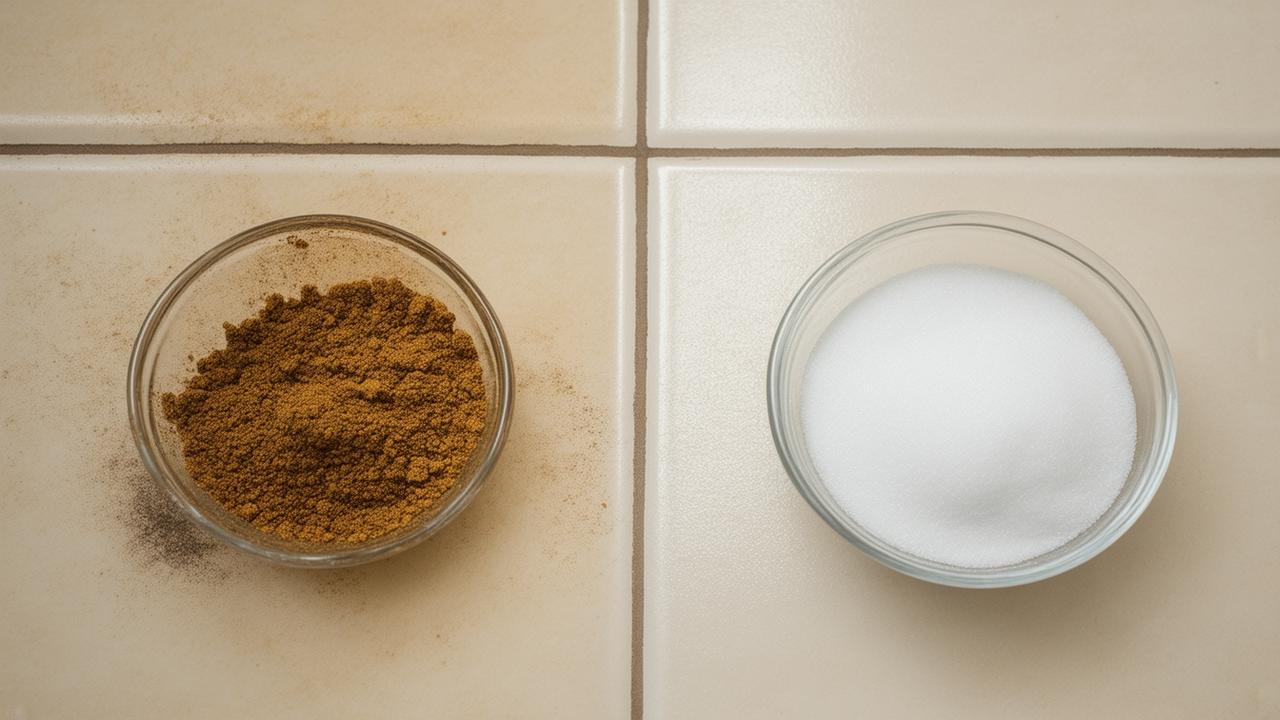
The first thing you notice isn’t the tile. It’s the lines between them. Once white, they’ve slowly faded into a tired gray, like old snow at the side of the road. You mop. You scrub. You buy that expensive cleaner your neighbor swears by. Still, the grout keeps that faint shadow of age, as if your floor is permanently stuck in “before” photos of a renovation. So when someone tells you that three everyday ingredients—things you probably already own—can make it look new in just 15 minutes, it sounds like one of those too-good-to-be-true tricks. But then you mix them, smooth the paste into those dingy lines, and something almost magical happens.
The Afternoon the Bathroom Changed
Imagine this: it’s a slow Sunday afternoon. The light is slanting through the bathroom window, catching dust motes that dance lazily in the air. You’re standing barefoot on cold tile, eyeing the grout that has bugged you for months. You’ve tried ignoring it, but every shower, every trip to brush your teeth, there it is—those skinny, dark seams that make the whole room look…tired.
You’ve reached that moment when something has to give, but you’re not in the mood for industrial-strength fumes or an all-day cleaning marathon. What you want is simple: a small, almost ritual-like task you can finish before the kettle boils dry. So you head to the kitchen.
In the quiet clatter of opening cupboards, you put three things on the counter: baking soda, hydrogen peroxide, and a little dish soap. They sit there looking unremarkable and familiar, which is exactly what makes what happens next feel a bit like a secret.
The Three-Ingredient “Potion”
There’s something satisfying about mixing ingredients by hand. It’s half kitchen chemistry, half quiet act of care. You scoop a few spoonfuls of baking soda into a small bowl. The powder is light, soft, and squeaky under the spoon, like very fine sand. Then you pour in hydrogen peroxide—just enough to form a spreadable paste. It bubbles softly, an almost imperceptible fizz, as if waking up.
A dash of dish soap goes in last—thick, smooth, adding just a hint of gloss to the mixture. You stir slowly. The paste becomes creamy, pearly, like a homemade scrub. At this point, it smells faintly clean, but not sharp or aggressive. There’s no chemical punch to the nose, no need to hold your breath.
This is your grout cleaner. No fancy label, no complicated instructions, no neon warnings. Just three things that know how to work together.
| Ingredient | Approximate Amount | What It Does |
|---|---|---|
| Baking soda | 3 parts | Gently abrasive; helps scrub stains out of porous grout. |
| Hydrogen peroxide (3%) | 2 parts | Lightens discoloration and penetrates into the grout surface. |
| Dish soap | 1 small squeeze | Cuts through grease and everyday buildup; helps the paste spread. |
No special tools are required, but there’s a small pleasure in choosing your weapon: an old toothbrush, a soft-bristled scrub brush, maybe even a cotton swab for those tight corners. You line them up like brushes beside a palette, the grout your waiting canvas.
That First Satisfying Swipe
The first touch of the paste on the grout is oddly calming. You dip the toothbrush in and drag it along the narrow line between two tiles. The mixture clings, pale and thick, filling the tiny valley. The gray disappears under the mask of white, and already the room looks different—like freshly fallen snow covering a worn path.
You work in small sections, tile by tile, like stitching a quilt in reverse. The rhythm is simple: dip, swipe, smooth, move on. The world narrows to the square footage of your floor, the quiet sound of bristles against tile, the faint crackle of tiny bubbles doing their patient work.
As you go, you can’t help noticing the little things: the way the paste settles neatly into the grout lines and stubbornly clings to them. The way your shoulders relax into the task. It’s work, yes, but with a strangely meditative quality. There’s no rush. This is not a job for frantic scrubbing; it’s a slow, steady coating, like frosting a very geometric cake.
Once a section is covered, you sit back on your heels and let it be. This is where the clock starts—your 15-minute window.
The Quiet Alchemy of 15 Minutes
Those 15 minutes are a kind of truce between you and your house. You’ve done your part: mixed, spread, smoothed. Now the mixture does what it was designed to do. The hydrogen peroxide seeps into the pores of the grout, nudging out the stains that have claimed space there for months, maybe years. The baking soda waits, ready to lift what’s loosened. The dish soap quietly works on the greasy film that never quite yields to ordinary mopping.
While the paste rests, you might wander into the kitchen and put on the kettle, just close enough to hear the soft hiss when it begins to boil. Or you might sit in the hallway, back against the wall, scrolling through your phone. But a part of you is listening for the silence of that bathroom, the subtle knowing that something is shifting in there, unseen.
The Reveal: Rinsing Back Time
When you return, the paste looks almost the same, only a bit drier around the edges. This is where the transformation becomes visible. You take a damp cloth or sponge—nothing fancy, just soft and clean—and start wiping the first section you treated.
The paste lifts easily, pulling away in streaks of cloudy white water. As you rinse and wring your cloth, you notice it: the grout underneath is lighter. Not just a little lighter—significantly, startlingly so. The line that was once dull and shadowed now runs bright and clean between the tiles, drawing a crisp pattern across the floor.
You wipe a little harder on a few stubborn spots, maybe giving them a quick once-over with the toothbrush again, but it’s more like polishing than cleaning. The hard part is already done. You keep rinsing, passing over the floor in overlapping strokes, watching the old wear and tear fade away with each swipe.
Standing up slowly, you look at the whole section—a patch of bathroom or kitchen floor that suddenly looks almost new. The tiles didn’t change. The room didn’t change. Just the thin lines between them. Yet the whole space feels brighter, calmer, more deliberate, like it’s been quietly reset.
Why This Simple Mix Works So Well
There’s a small science lesson tucked into that clean floor. Grout is porous—more like a sponge than stone. It absorbs spills, soap scum, oils from bare feet, splashes from cooking, and the fine dust of everyday life. Over time, these things don’t just sit on top; they settle in.
The baking soda in your mixture acts as a tiny army of scrubbers, gentle enough not to scratch your tile but rough enough to persuade embedded grime to move along. The hydrogen peroxide brings its mild bleaching and brightening powers, especially on light-colored grout. The dish soap cuts through the slippery film that regular mopping can smear rather than remove.
Together, they’re balanced. Not so harsh that you need a mask and open windows in winter. Not so weak that you’re left wondering why you bothered. And that 15-minute wait? That’s just long enough for them to get below the surface, so you’re not just cleaning what you can see—you’re reaching into the quiet depth where discoloration hides.
Turning a Chore into a Quiet Ritual
Once you’ve seen what those three ingredients can do, something changes in the way you think about this little task. Cleaning grout stops being that dreaded, once-in-a-blue-moon ordeal and becomes more like a simple ritual you revisit when the lines start losing their crispness again.
Maybe it’s every few months, on an afternoon when the house is still and your mind needs something easy and tangible. You pull out the same ingredients, the same bowl, the same trusty old toothbrush. The motions come back like muscle memory: pour, stir, spread, wait, wipe. There’s a quiet comfort in that sequence, a reassurance that you can reclaim this small corner of your space whenever it begins to feel a bit worn down.
➡️ Neither swimming nor Pilates: experts reveal the best activity for people suffering from knee pain
➡️ I do this every Sunday”: my bathroom stays clean all week with almost no effort
➡️ Goodbye to classic high kitchen cabinets as more households switch to a space-saving, more comfortable alternative
➡️ Hair dye addiction is quietly ruining scalps everywhere but stylists still say it is safe how often is too often
➡️ Day will turn slowly to night during the longest total solar eclipse of the century occurring across several regions
➡️ Mark Zuckerberg’s AI announcement shakes the global scientific community
➡️ Here Is How A Bay Leaf Can Make You Look Younger: Visible Effects In Just A Few Days
Over time, you might find yourself looking at other parts of the house differently. Noticing how a simple, thoughtful touch—a wiped-down windowsill, a polished doorknob, a decluttered shelf—can shift the entire mood of a room. That grout, in all its quiet transformation, becomes a reminder that renewal doesn’t always come from big renovations or new furniture. Sometimes it’s three simple ingredients and 15 minutes.
Keeping Those Lines Bright
Once your grout looks fresh again, maintenance becomes a gentle habit rather than a battle. You might keep a small jar of pre-mixed baking soda and a bottle of hydrogen peroxide tucked under the sink, ready for quick touch-ups. A light scrub here and there, especially in the spots that see the most traffic—by the shower, in front of the stove, just inside the doorway—can stretch that “like new” feeling longer than you’d expect.
Mopping with warm, mildly soapy water and rinsing well helps, too. The less buildup your grout collects day to day, the less work that paste has to do when you bring it out. It becomes a partnership: you give your floors a little care often, and in return they give you back the quiet pleasure of walking through a space that feels tended, not neglected.
When a Small Change Feels Like a Fresh Start
Later that evening, when the floor has dried and the room has settled into its usual rhythm, you might pass by the bathroom or kitchen without thinking. Then you pause, glancing down. The grout lines catch your eye again—but this time in a good way. They’re bright, clean, sharp. The tiles stand out like pages in a freshly opened book.
Nothing dramatic has happened. No walls were knocked down, no new tiles installed. But there’s a quiet, almost tender satisfaction in knowing that your hands, a bowl, and three unassuming ingredients did this. You didn’t need an expert or a shopping spree. Just a little time, a little attention, and the willingness to look closely at the small, overlooked seams in your home.
The next time the grout begins to fade into that dull gray again—as it inevitably will, because life is messy and lived-in—you’ll already know what to do. You’ll walk into the kitchen, collect your familiar trio, stir them into that soft, pearly paste, and begin again. Line by line, tile by tile, reclaiming the quiet beauty hiding in plain sight.
Frequently Asked Questions
How long should I leave the mixture on the grout?
Around 10–15 minutes is usually enough. For very stubborn, older stains, you can extend it to about 20 minutes, but avoid letting it dry completely on the surface.
Is this mixture safe for all types of tile?
It’s generally safe for ceramic and porcelain tile. For natural stone (like marble, travertine, or slate), test a small hidden area first, or avoid using it, as baking soda can be too abrasive for some stone finishes.
Will this work on very dark or colored grout?
Yes, but hydrogen peroxide has mild lightening properties. If your grout is dark or colored, test a small, inconspicuous area first to be sure it doesn’t lighten more than you’d like.
How often can I use this method?
For most homes, using it every few months, or as needed in high-traffic areas, is enough. It’s gentle enough for occasional use, especially if you’re not scrubbing aggressively.
Do I need to wear gloves or a mask?
Gloves are a good idea if you have sensitive skin, as baking soda and dish soap can be drying. A mask is usually not necessary, since hydrogen peroxide at 3% strength has mild fumes compared to harsher cleaners.
Can I store leftover paste?
It’s best to mix only what you need. Hydrogen peroxide breaks down over time, especially when exposed to light and air, so a fresh batch will always work best.
Will this completely restore very old, deeply stained grout?
It can significantly improve the look of old grout, often making it look dramatically fresher. However, grout that’s extremely stained or damaged may not return to its original color and might eventually need regrouting or professional treatment.