The first thing you notice is the sound. That soft, hollow creak under your bare feet on a quiet morning, the way the boards answer you like an old friend. Hardwood floors are living history under our soles—sun-faded patches where the dog naps, faint grooves where a highchair once rocked. But sometime between coffee stains and winter boots, that warm glow turns to a tired, dull blur. So you stand in the aisle of the store, staring at rows of bottles and miracle sprays, wondering which one will actually make your floor look like itself again—and which one will leave it cloudy, sticky, or worse, damaged.
The Problem with “Shiny” in a Bottle
Walk into any big-box store and you’ll be hit with a whole vocabulary of promise: “instant gloss,” “mirror shine,” “deep renewal.” The labels shimmer with reflections that your real floor has not seen in years. For many of us, the first impulse is to grab whatever says “shine” in the biggest letters. Then there’s the old advice that circles around social media and family lore: mop with vinegar, polish with wax, maybe even add a splash of oil or soap “like Grandma did.”
But hardwood is stubbornly honest. It shows you exactly what you give it.
Vinegar, that darling of DIY cleaning, is an acid. Over time it can strip the finish from your floor, leaving it more vulnerable to scratches and water. Wax can build up into a filmy layer that attracts dust and dulls the look instead of brightening it. Oil soaps often leave residue that’s hard to remove and may interfere with any future refinishing. The quicker the gloss arrives, the more likely it is to be fake—a coating that sits on top of the finish instead of coaxing life back out of it.
So where does that leave you, standing in the aisle, wanting floors that shine without turning your home into a chemistry experiment or a long-term refinishing project?
The Surprising Truth: Shine Comes from Clean, Not from Coats
There’s a quiet, almost old-fashioned secret about hardwood floors: when they’re clean in the right way, they shine themselves. Not plastic shine, not glassy with product, but that gentle, soft reflection that changes as the light moves across the room. The glow you’re chasing is usually not locked away under grime; it’s simply smudged, veiled by fine dust, tiny grit, leftover soap, and residue from well-meant cleaners.
The trick isn’t vinegar. It isn’t wax. It isn’t some obscure oil from faraway trees. It’s a simple combination of three things you can do at home—things that respect the finish that’s already on your floor instead of trying to fight it.
Before we walk through the steps, imagine this scene: you open the curtains on a cool, bright morning. Light spills in and sweeps across the dining room. Instead of scattering across dull patches and streaks, it glides along the boards, picking up the warm tones of oak or walnut. You see the natural grain again, the way each plank has its own personality. And you did it with nothing exotic—just time, patience, and a little bit of science on your side.
Step 1: Dry Cleaning Like You Mean It
Most hardwood floors never get truly clean because we rush the dry part. But dust is not innocent; it’s tiny sandpaper. It scuffs the finish every time you walk across it, and it steals your floor’s ability to reflect light.
Start by slowing down. Use a soft microfiber dust mop or a vacuum with a hardwood setting (no beater bar) and go methodically across the room. You’re not just chasing tumbleweeds of pet hair—you’re gathering invisible grit, salt tracked in from winter sidewalks, and the powdery residue of everyday life. Work in straight lines, overlapping as you go, the way you might mow a lawn. Pay attention to the borders where floor meets wall, under the edges of rugs, beneath the couch where dust drifts to hide.
You’ll be surprised how much this alone changes the look of your floor. When dust is gone, light has less to catch on. The surface begins to show a quiet clarity, like a window cleaned after a long season of storms.
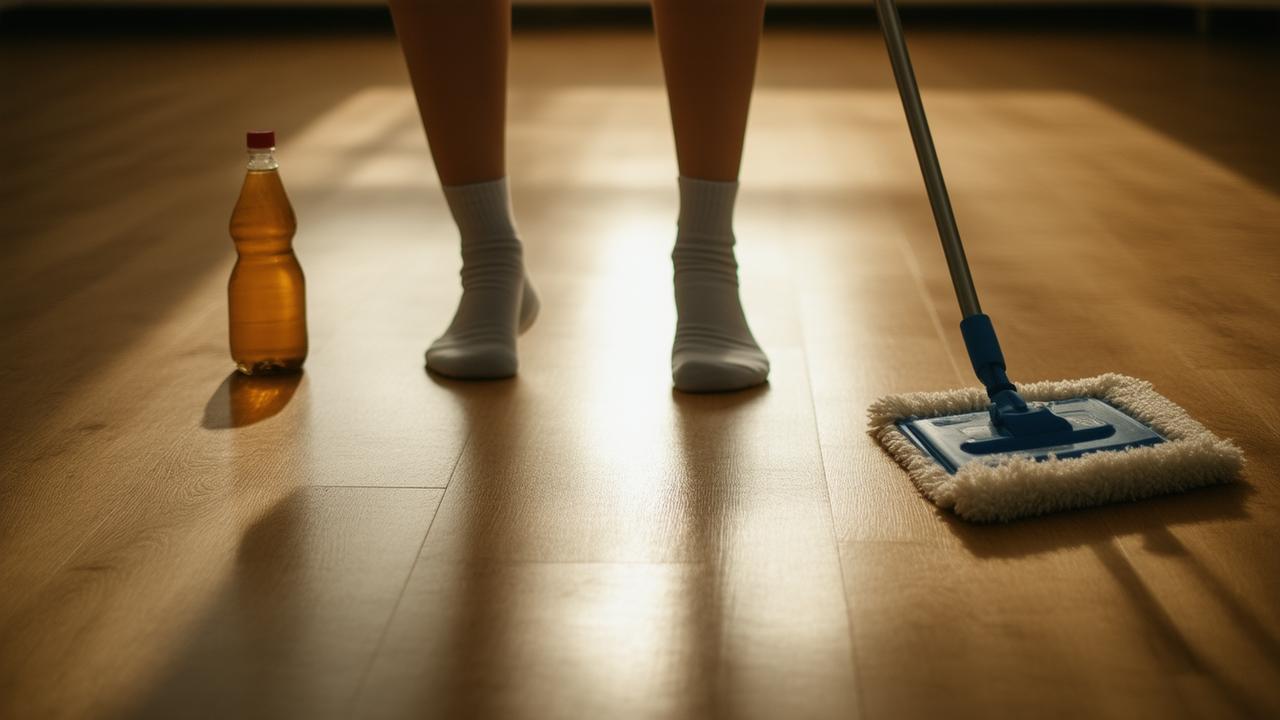
Step 2: A Gentle, Exacting Wash (No Vinegar, No Suds)
Next comes what most people think of as “mopping,” though the real magic is in how little water you use and how mild the solution is. Hardwood hates being soaked. Water seeps between boards, swells edges, and leaves subtle warping that you’ll feel underfoot long after you’ve forgotten what went wrong.
Here’s the heart of the trick: a simple, pH-neutral solution that cleans without stripping. You don’t need vinegar, and you definitely don’t need a bucket full of bubbles.
Picture this setup on your kitchen counter:
- A clean bucket with warm (not hot) water
- A small amount of a gentle, pH-neutral floor cleaner made for sealed hardwood
- A flat microfiber mop head, wrung nearly dry
You dip the mop, wring it well until it’s only slightly damp—no dripping, no pooling—and then work it along the grain of the boards. The room fills with a faint, clean scent rather than the sharp bite of vinegar or the perfume of artificial fragrance. As you move, you’re not sloshing; you’re whispering over the surface, lifting away invisible films of oil and old cleaner residue.
Work in small sections so no part of the floor stays wet for more than a minute or two. If your mop stops gliding and starts dragging, it’s telling you the cloth is dirty; rinse, wring, and continue. The goal is clarity, not coating. When you’ve finished a room and step back, the wood may not yet be “shiny,” but it will look fresh, honest, and open.
The Bare-Bones Recipe: Simple Ratios, Big Difference
What makes this home trick special isn’t a secret ingredient—it’s the simplicity and restraint. The fewer things you add, the less that can go wrong. Here’s a straightforward guide you can adapt to your space:
| Component | What to Use | How Much | Why It Works |
|---|---|---|---|
| Water | Warm, clean tap water | About 4 liters (1 gallon) | Carries dirt away without shocking the finish |
| Cleaner | pH-neutral cleaner for sealed hardwood | Follow label; usually 1–2 caps per bucket | Lifts oils and grime without stripping or etching |
| Mop | Flat microfiber mop head | 1–2 clean heads per medium room | Microfiber grabs particles instead of spreading them |
| Drying | Soft, dry microfiber cloth (optional) | Use by hand on stubborn damp spots | Prevents water spots, speeds up the shine |
There’s no vinegar in that bucket. No wax, no oil, no soap. Just a gentle cleaner doing its work and leaving almost nothing behind. If your floors are especially tired-looking, the revelation often comes after the second or third time you clean this way—layers of old residue slowly lifting until the original finish can finally show its face again.
The Final Touch: Buffing Light Back into the Wood
Here’s where the “like new” feeling steps out of the shadows.
Once the floor is completely dry, take a clean, dry microfiber cloth or a large microfiber dust mop (with a fresh, unused pad) and lightly buff the surface. You don’t need pressure; you need patience. Move with the grain. Glide, don’t scrub. As you pass over each board, you’re not applying anything—you’re redistributing tiny, invisible moisture left in the finish, smoothing out micro-streaks, and encouraging light to reflect more evenly.
Watch under a window where the sun comes in at an angle. You’ll start to see that gentle gleam appear—not plastic-slick, not glassy, but a low, confident glow that follows you as you move. This is the floor’s own shine, not a costume. You can feel it too: no tackiness, no squeaky residue, just a clean, satin-smooth surface underfoot.
This simple buffing step is what most “quick mop and go” routines miss. It’s like drying your hair properly instead of letting it air-dry into frizz. The wood has been cleaned; now you’re guiding it into its best version of itself.
➡️ North Atlantic alert as orcas begin targeting commercial ships in what experts describe as coordinated attacks
➡️ Hairstyles after 60 : forget old-fashioned looks this haircut is widely considered the most youthful by professional hairstylists
➡️ Official and confirmed : heavy snow is set to begin late tonight, with weather alerts warning of major disruptions, travel chaos, and dangerous conditions
➡️ I’m a Primark store director: here’s how much I really take home each month
➡️ From February 8, pensions will rise: but only for retirees who submit a missing certificate, leaving many saying
➡️ Nivea: “I’m a dermatologist and I carefully studied the iconic blue cream’s formula, here’s my honest assessment”
➡️ Auto technicians explain how keeping the gas tank above half prevents fuel line freeze
Living with Your Floors: Tiny Habits, Lasting Glow
Once your hardwood is shining again, keeping it that way is less about big cleaning days and more about small rituals—tiny acts of respect for a surface that carries you through every hour of your life at home.
- Shoes off at the door: Gravel, salt, and street grit are the enemies of shine. A simple habit change protects the finish better than any polish ever could.
- Mats where the world enters: At every exterior door, a sturdy mat outside and a softer, absorbent one inside. They quietly trap what your floors don’t want.
- Weekly dry dusting: A quick run with a microfiber dust mop once or twice a week to keep grit from turning into fine scratches.
- Monthly gentle wash: That same light, pH-neutral wash—just enough to reset the surface without overwhelming it.
- Spill triage: Wipe liquids immediately. The less time water and juice have to think about your floor, the better.
Over months and years, these small habits build a story into the wood: the places where the path from kitchen to couch is worn just a little smoother, where the light from the hallway stretches longer in late afternoon. A floor well cared for doesn’t look untouched—it looks deeply, vividly lived in.
When “Like New” Doesn’t Mean Perfect
There’s a quiet freedom in letting go of the idea that your floors should look as if no one lives there. “Like new” doesn’t have to mean flawless. It can mean alive.
After a few cycles of this simple no-vinegar, no-wax routine, you might still see the deeper scars: the dent from the dropped pan, the faint ring where a plant once leaked unseen, the scratch from the time a chair was dragged instead of lifted. These marks belong to the floor now, as much a part of its character as the grain of the wood.
The shine you’ve brought back doesn’t erase those stories; it frames them. It tells you that the finish is still strong, still capable of catching light and giving it back. And if, someday, the wear grows deeper and the glow refuses to return, then you’ll know it’s time not for another bottle of promise, but for a proper refinishing—a new chapter in the same familiar boards.
Until then, the simplest trick remains the truest: keep it clean, keep it dry, treat it gently, and let the wood do the rest.
FAQs: No Vinegar, No Wax, All Shine
Can I ever use vinegar on hardwood floors?
It’s safest to avoid it. Vinegar is acidic and, over time, can dull or damage the finish, especially on polyurethane-coated floors. Occasional light use might not cause visible disaster, but repeated cleaning with vinegar quietly erodes the very layer that protects your wood.
What if my floors already have wax or oil buildup?
If you see cloudiness, smears, or uneven shine that doesn’t improve with gentle cleaning, you may have product buildup. In mild cases, repeated cleaning with a pH-neutral hardwood cleaner and microfiber can slowly reduce the film. Heavy buildup usually needs professional stripping or sanding—especially if multiple wax or “polish” products were layered over time.
How do I know if my floor is sealed and safe for this method?
Most modern hardwood floors are sealed with polyurethane or another durable finish. A quick test: put a single drop of water on an inconspicuous area. If it beads up for a few minutes instead of soaking in and darkening the wood, the floor is sealed. If it soaks in quickly, you likely have an unsealed or lightly oiled floor and should follow the manufacturer’s or installer’s specific care instructions.
Can I use steam mops on hardwood floors?
It’s not recommended for most hardwood. Steam forces moisture and heat into the seams and can damage both the finish and the wood underneath over time. Even if it looks great at first, invisible harm may be building beneath the surface.
How often should I do the full clean-and-buff routine?
For a typical household, a gentle damp clean once a month is plenty, with dry dusting once or twice a week. High-traffic homes with pets or kids might benefit from a light damp clean every two weeks. Buffing after each wash takes only a few extra minutes and makes a noticeable difference in how the floor reflects light.
Is there any “natural” cleaner I can mix myself?
The safest home “mix” is actually just warm water used correctly and sparingly, paired with microfiber. If you really want a solution, use a very small amount of a simple, unscented, pH-neutral cleaner intended for sealed floors. Avoid dish soap, vinegar, baking soda, and oils—each introduces its own kind of residue or risk.
Will this trick fix deep scratches or worn patches?
No cleaning method can repair actual damage to the wood or finish. This simple, no-vinegar, no-wax approach restores clarity and the natural shine of the existing finish. Deep scratches, grey worn paths, and bare wood still require professional refinishing or, in some cases, spot repair. But until that day, caring gently for what you have will keep the floor stable, attractive, and ready for its next chapter.