The first time I saw it happen, I actually stepped back and stared. The late afternoon sun was slanting through the living room windows, catching the floor at just the right angle—the kind of light that usually exposes every streak, scuff, and stray crumb. But that day, the old oak boards didn’t look tired and dull. They glowed. Not just “clean,” but almost liquid, like someone had poured warm amber over the planks and buffed it to glass. The secret, my neighbor admitted with a conspiratorial grin, wasn’t some fancy store-bought polish. It was sitting, unnoticed, in almost every pantry on the block.
The Surprising Star of the Pantry
When you think about polishing hardwood floors, your mind probably conjures gleaming bottles with shiny labels and chemical names you can’t pronounce. But the humble hero in this story doesn’t come with a commercial logo. It’s distilled white vinegar. Yes, the same stuff you splash into salad dressings and use for cleaning windows. Homeowners have been quietly swearing by it for generations, passing the trick along like a secret family recipe.
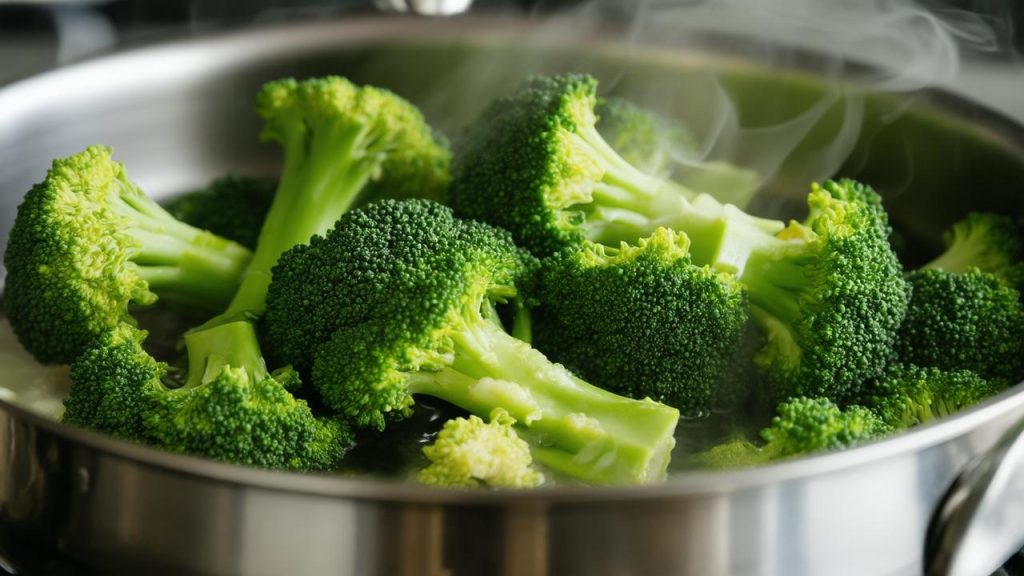
Vinegar has this almost magical way of cutting through the invisible film that builds up on hardwood: the residue from cleaning products, the faint traces of oils from bare feet, the fine dust that never quite lifts with vacuuming. Used the right way and in the right amount, it doesn’t just clean—it reveals. It removes what’s been dimming the wood’s natural shine and lets the original character of the floor step back into the light.
But here’s the important part: vinegar is strong, and hardwood floors are proud but sensitive. This isn’t a “glug some into a bucket and hope for the best” kind of situation. It’s about balance, dilution, and gentle repetition. Done correctly, you get that subtly dazzling, brilliant sheen without leaving a sticky film or stripping away the finish you paid good money for.
Preparing Your Floor: Setting the Stage for Shine
Before you even think about dipping a mop into a bucket, you need to prepare the canvas. A hardwood floor, no matter how glossy you want it to become, won’t shine under a layer of dust, grit, or pet hair. So you start with the basics—but you do them with intention.
Imagine you’re setting a stage for light. First, sweep slowly, listening to the soft scratch of bristles across the grain. Move chairs, slide rugs aside, and coax out crumbs from under the sofa. Follow up with a vacuum—ideally one with a “hard floor” setting, so you’re not grinding a beater bar into your finish. You’re not just clearing dirt; you’re uncovering the wood, plank by plank, letting the pattern of knots and whorls reappear.
Now, pause and look closely. Are there sticky spots from a long-forgotten spill? A dull patch where shoes always seem to land at the doorway? Wipe those first with a slightly damp cloth and a drop of mild dish soap, then rinse with a clean damp cloth. You want the floor to be free from anything stubborn before your vinegar mixture ever touches it.
Think of this stage as the deep breath before the transformation. The floor might look “pretty clean” already—but what you’re preparing it for isn’t just cleanliness. It’s clarity.
The Simple Vinegar Solution (And How to Use It)
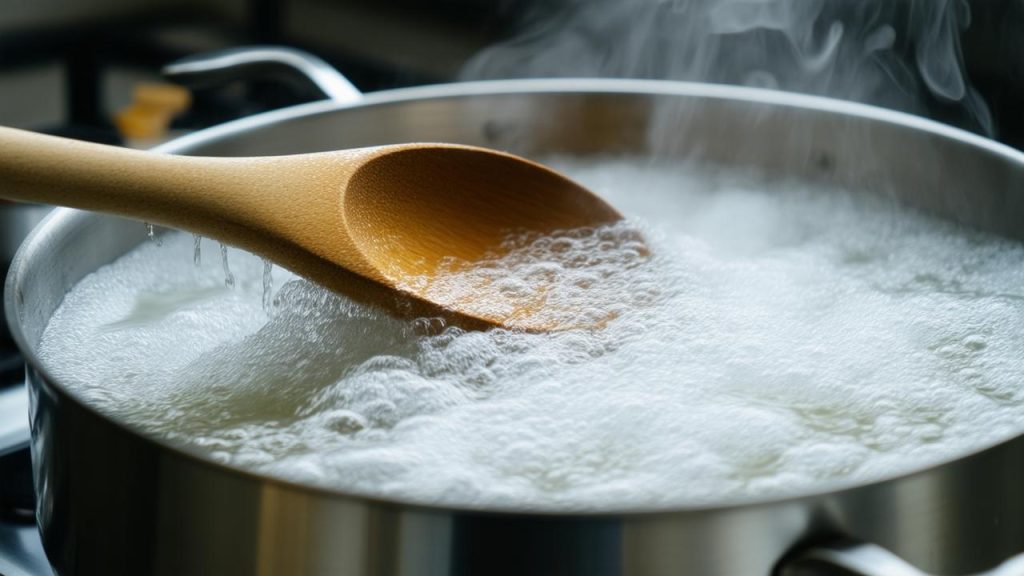
This is where that unassuming pantry bottle steps into the spotlight. The trick is in the ratio. Full-strength vinegar is far too intense for hardwood floors over time; you want a gentle, diluted solution that cleans without bullying the finish.
Use this basic formula as your go-to blend:
| Ingredient | Amount | Purpose |
|---|---|---|
| Warm water | 1 gallon (about 3.8 L) | Dilutes and carries the cleanser |
| Distilled white vinegar | 1/2 cup (about 120 ml) | Cuts grease, residue, and dulling film |
| (Optional) A few drops of mild dish soap | 2–3 drops | Helps with very grimy areas |
Stir gently. The water should feel pleasantly warm to the touch—not hot. Hot water can stress certain finishes, and you’re aiming for kindness here, not shock treatment.
Now comes the part many people rush, but that matters most: the mop. Skip anything stringy and sopping. What you want is a flat microfiber mop or a well-wrung soft mop that barely clings to dampness. Dip it, then wring it as if you’re determined to squeeze out nearly every last drop. When you glide it across the floor, there should be no standing water, no little reflective puddles, just a whisper-thin, quickly drying sheen.
Work in sections, following the direction of the wood grain. As you move, you might notice something satisfying: the faint haze that had settled over the boards begins to vanish. It’s subtle at first, the way the reflection from a window suddenly sharpens, or a previously muted plank reveals more defined streaks and shadows in the wood.
If your water starts to look murky, don’t push your luck. Dump it and mix a fresh batch. You’re trying to remove residue from the floor, not spread a diluted version of it from one room to the next.
Where the Shine Comes From (It’s Not What You Think)
Here’s the thing about truly beautiful hardwood floors: the real shine isn’t something you smear on top. It’s something you uncover. So much of what makes a floor look dull has nothing to do with worn-out finish and everything to do with layers of invisible build-up—cleaners that promise “glow,” polishes that leave a sticky film, even well-meaning sprays that attract dust like a magnet.
Vinegar, used sparingly and correctly, doesn’t coat the wood. It dissolves the film that’s been masking the finish you already have. That’s why the result feels different from what you get with a heavy “polish.” Instead of a glossy, artificial shell, you see the clear, honest reflection of the original surface. Light doesn’t sit on top of a layer of wax; it slips along the contours of the grain, pools in the low spots, and highlights the edges of every board.
This is also why so many homeowners, once they try it, never quite go back. There’s a certain satisfaction in realizing that the brilliance was already there; it was just being smothered. That familiar, faintly sharp scent of vinegar while you work—yes, it lingers for a little while—begins to feel like the smell of fresh beginnings. And as it fades, what’s left behind is the soft, dry, almost silky feel of clean wood under bare feet.
You may notice that the transformation is most dramatic the first time. That’s when you’re lifting off months, maybe years, of residues. After that, each cleaning becomes more like maintenance—a quick polishing of a window that you now know how to keep clear.
Finishing Touches: Buffing, Drying, and Protecting
Once you’ve finished mopping, resist the urge to walk all over your work. Hardwood doesn’t like to sit damp, even with a diluted vinegar solution. Make sure windows are open if the weather allows, or turn on ceiling fans to help the moisture evaporate quickly. Within a short time, the boards should look and feel dry—not tacky, not almost-dry, but clean and crisp to the touch.
If you want to coax out that extra degree of brilliance—the kind that makes guests pause and glance down—reach for a dry microfiber cloth or a dry flat mop head. Gently buff sections of the floor, again following the grain. This isn’t a workout; it’s more like petting the surface, encouraging it to catch the light. You’ll see it happen: subtle reflections sharpen, edges around window-glow become a bit more defined, and the floor starts to take on a quiet, confident gleam.
➡️ Light fast apple cake made with oil and yogurt for effortless desserts
➡️ Known as the most fertile soil on Earth, the “black gold of agriculture” has chernozem layers up to 1 meter deep and turned Ukraine, Russia and Kazakhstan into one of the world’s biggest breadbaskets and strategic assets
➡️ I learned it at 60: few people actually know the difference between white and brown eggs
➡️ Hygiene after 65 : not once a day, not once a week, here’s the shower frequency that keeps you thriving
➡️ Many people don’t realize it, but sweet potatoes and regular potatoes are not closely related at all, and science explains why
➡️ If you grew up in the 1960s or 1970s, you were likely taught life lessons that have quietly disappeared from modern education
➡️ If the ATM keeps your bank card this fast little technique instantly retrieves it before help arrives
From here, think of protection rather than more product. Felt pads under chair and table legs. Rugs in high-traffic areas, especially near entryways where grit sneaks in on shoes. A gentle reminder by the door to kick off those hard-soled shoes before wandering in.
And perhaps the most underrated protective habit: frequency. A light vinegar-and-water clean—no more than once every week or two for most homes—is usually enough to keep the shine effortless. In between, a quick dry mop or vacuum does the heavy lifting. That way, you’re never letting the dulling layer build up enough to hide the sheen you’ve worked to reveal.
When Vinegar Is Not the Answer
As charming as this pantry trick is, it comes with an important caveat: vinegar is not a one-size-fits-all hero. Some floors should never meet it—at least not directly.
If your hardwood is waxed (rather than finished with a polyurethane or similar surface sealer), vinegar can cloud or strip that wax over time. If your floors are unfinished, very old and fragile, or labeled as “no-vinegar” by the manufacturer, respect those warnings. Engineered wood floors with certain finishes can also be fussy about acidity.
When in doubt, do a quiet little test. Choose an out-of-the-way corner—behind a door, under a movable piece of furniture. Clean that patch with your diluted vinegar solution, then let it dry completely. Look at it in good light. Has the sheen improved, stayed the same, or gone hazy? Run your fingers lightly across it. Does it feel smooth and natural, or slightly rough and stripped? If anything feels off, stop. For those particular floors, stick to manufacturer-approved cleaners and reserve your vinegar for the windows, the counters, and the kettle.
Respecting the limitations of this method doesn’t diminish its magic. It just reminds you that every floor, like every tree it once belonged to, has its own character and needs. The real craft lies in matching the tool to the surface, the recipe to the story your home is trying to tell.
Frequently Asked Questions
Can I use apple cider vinegar instead of white vinegar?
Distilled white vinegar is best. Apple cider vinegar can leave a faint tint or residue and often has more sugars, which may attract dirt. For hardwood floors, clear and simple is safest.
Will vinegar make my hardwood floors dull over time?
Used properly—highly diluted, with a damp (not wet) mop—vinegar typically removes dulling residue rather than causing it. Overuse, strong mixtures, or soaking the floor, however, can damage finishes, so moderation is essential.
How often should I clean my floors with vinegar and water?
For most homes, once every 1–2 weeks is plenty. In between, rely on dry sweeping or vacuuming. Using the solution daily is unnecessary and may stress the finish in the long run.
Is it safe for pets and kids?
Once the floor is dry, a diluted vinegar solution is generally considered safe for households with children and pets. Keep the bucket out of reach while you’re cleaning, and allow the floor to dry completely before they go racing back across it.
What if my floors are still not shiny after cleaning with vinegar?
If the floor stays dull after a few careful cleans, you may be dealing with worn finish rather than build-up. In that case, no cleaner—vinegar or otherwise—can restore shine fully. You might need a professional buff and recoat, or even refinishing, to bring back that deep, lasting glow.