The first thing you notice isn’t the car itself. It’s the smell. That faint mix of coffee, rain-damp jackets, fast-food wrappers, and something you can’t quite name. You open the door and the fabric sighs as you sit down, sun-warmed and familiar. Then, as your eyes adjust to the light slipping through the windshield, you see it — the constellation of your life, written in stains across the seats. Coffee halos. Muddy arcs from a soccer cleat. A sticky, dark patch where a melted chocolate bar met August heat. You run your hand over the fabric, feeling the roughness where fibers have stiffened with old spills, and you think: there has to be a better way to deal with this. And maybe, just maybe, it doesn’t have to involve the sharp sting of vinegar or the gritty fizz of baking soda at all.
The Quiet Science of a Clean Seat
Most cleaning stories start with drama: strong odors, foaming powders, harsh chemicals that burn your nose before they lift a single stain. For years, vinegar and baking soda have been crowned the do-it-yourself royalty, trotted out for every mess. But your car seats are more than just fabric and foam; they’re where your kids nap, where you spill fries as you eat between errands, where your dog settles in after a muddy walk. They deserve something a little more thoughtful.
Imagine a cleaner that feels almost invisible as it works. No acrid tang filling the air, no powdery residue clinging to seams. Just a gentle dampness, a slow loosening of grime, and the surprising satisfaction of watching once-dull fabric bloom back to life. This is the quiet science of cleaning car seats with a different approach—no vinegar, no baking soda, no drama, just method.
The secret isn’t magic. It’s surfactants—molecules that loosen dirt and oils without assaulting your senses, the same kind of gentle technology that keeps your clothes soft and your favorite T-shirt from fading away. Pair that with a little bit of patience, some deliberate movements, and common household items, and you’ve got a formula that feels more like caretaking than damage control.
Meet Your New Cleaning Allies (Spoiler: They’re Already at Home)
Walk into your kitchen or laundry room and you’ll find almost everything you need. Not the sharp-smelling jar of vinegar you use on windows. Not the orange box of baking soda tucked in the pantry. Something simpler. Something quieter.
All you really need for most car seat stains is this trio: a gentle, fragrance-light liquid laundry detergent or dish soap; warm water; and a soft-bristled brush or clean microfiber cloth. If your seats are fabric, that’s your main line of defense. If you’re dealing with faux leather or leather, a mild soap solution and a dedicated leather conditioner will become your new best friends.
There’s also one tool that turns the whole experience from chore to small ritual: a handheld spray bottle. Filling it with warm, slightly soapy water feels almost ceremonial. You shake it gently, listening to the soft slosh inside, and suddenly cleaning doesn’t feel like punishment. It becomes a conversation between you and the material that’s been carrying you around for years.
| Item | Purpose | Best For |
|---|---|---|
| Mild liquid laundry detergent or dish soap | Breaks down oils, food, and everyday grime | Fabric seats, cloth inserts, seat backs |
| Warm water in a spray bottle | Dilutes soap, lightly mists surface, avoids soaking foam | All seat types |
| Microfiber cloths | Lifts dirt, absorbs moisture, reduces streaking | Fabric, leather, vinyl |
| Soft-bristled brush (or old soft toothbrush) | Agitates fibers, loosens stubborn stains | Textured or woven fabrics |
| Leather conditioner (for leather seats) | Restores suppleness, prevents cracking | Genuine leather, high-end interiors |
The Ritual: Step-by-Step Without the Sting
Step 1: Listen to the Fabric
Before you begin, pause. Touch the seat. Run your fingers along the seams and feel where crumbs hide. Notice where discoloration is worst. This isn’t just about scrubbing away stains; it’s about learning the story of your car’s interior.
Start by vacuuming, slowly. Move in overlapping lines like you’re mowing a tiny lawn. Each pass pulls out grit, sand, and the little stones that can cut into threads when you scrub. If you’ve ever wondered why some seats look frayed and tired after cleaning, it’s often because this step was rushed or skipped.
Step 2: Mix a Gentle Solution
Fill a small bowl or bucket with warm (not hot) water. Add a few drops—a teaspoon or two—of your mild detergent. Stir until the water looks barely cloudy, not foamy. You’re aiming for whisper-soft cleaning power, not a bubble bath.
Pour some of this mixture into your spray bottle, then top up with more warm water. Shake gently. This diluted mist will let you control the moisture, so you don’t soak your seats and invite mold or lingering damp smells.
Step 3: Mist, Don’t Drench
Lightly mist a small section of the seat, no bigger than a dinner plate. You want the surface to feel cool and slightly damp when you touch it, not wet. Press your palm down and lift it. If you see beads of water, you’ve gone too far; dab them away with a dry cloth before you continue.
Now, dip your microfiber cloth—or your soft-bristled brush for stubborn areas—into the soapy water in your bowl. Wring it out thoroughly. The cloth should be damp, not dripping. This simple choice, between damp and drenched, is the difference between a refreshed seat and one that smells like a wet basement two days later.
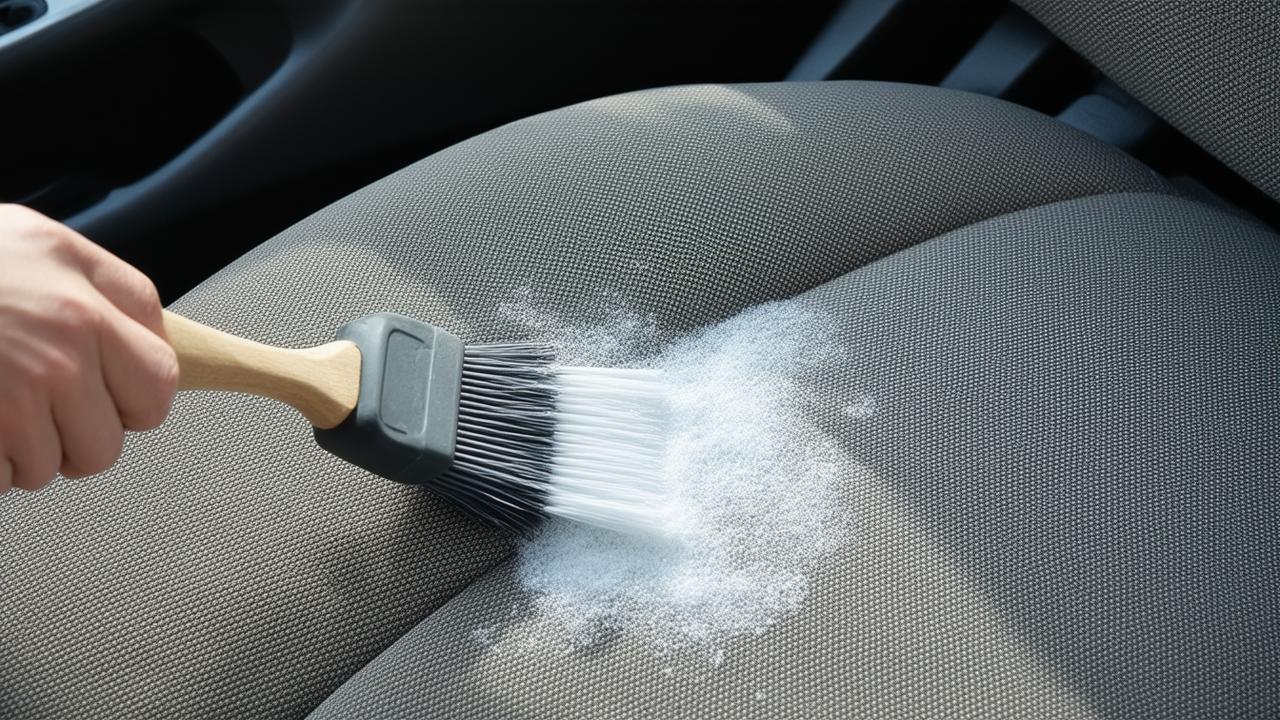
Step 4: Work With the Grain of Everyday Life
Begin to scrub in gentle, circular motions, letting the tips of the fibers move under your hand. If your seats have a visible weave, follow it—side to side, then up and down, as if you’re combing hair. You’ll feel the roughness soften. Stains that once seemed permanently baked into the fabric begin to blur, their edges fading first, then their color lightening like an old photograph left in the sun.
For tough stains—coffee, soda, or that mysterious dark patch—you can apply a drop of undiluted detergent directly onto your damp cloth, then focus on that spot. Work from the outside of the stain inward, so you don’t accidentally spread it further. Think of it as coaxing the stain out rather than attacking it.
Step 5: Rinse Without a Hose
Once an area feels clean under your hand, it’s time to “rinse,” even though you’re nowhere near a faucet. Rinse your cloth in clean, warm water, wring it well, and go back over the same spot with just the damp, soap-free cloth. You’re collecting the loosened dirt and excess detergent, preventing any sticky residue that might attract fresh grime later.
After this, press a dry microfiber cloth onto the area and hold for a moment, letting it soak up excess moisture. There’s a quiet satisfaction in that simple press-and-lift—seeing the faint imprint of dampness on the cloth and knowing it’s one step closer to dry, fresh fabric.
When the Stain Fights Back
Every car carries one or two legendary stains—the kind you point at and say, “That was the iced latte incident of last summer.” These are the ones you’ve probably thrown vinegar and baking soda at in the past. They fizzed, they smelled aggressive, and yet the shadow of the stain lingered, like a ghost.
The trick with these stubborn marks is not escalation, but repetition. Gentle cleaning, done twice or three times, often beats a single harsh assault. Let the area dry fully between attempts. Sometimes, a stain that looks like it’s barely budged when damp will appear dramatically lighter once the fabric is completely dry and fluffed back into place.
For protein-based stains—milk spills, ice cream, or that yogurt pouch that went rogue—slightly cooler water can help, as overly hot water can set them. For oily stains, like French fry grease or lipstick, a bit of mild dish soap on your cloth can work wonders, since it’s designed to cut through oils without stripping everything bare.
And if a ghost of a stain remains after your best efforts? That’s not failure. It’s patina—a reminder that your car is lived in, not staged for a photo shoot. You’ve removed the sticky residue, the odor, the grime. What’s left is just a whisper of memory, softened and harmless.
The Soft Art of Leather and Faux Leather
If your car seats are leather or faux leather, the storyline shifts from stain removal to preservation. The surface here is less forgiving of aggressive scrubbing and harsh, acidic solutions. Vinegar, especially, can slowly dry and dull leather over time, stealing its natural oils.
➡️ France suffers a €3.2 billion blow as a last-minute reversal kills a major Rafale fighter jet deal
➡️ Neither boiled nor raw : the best way to cook broccoli for maximum antioxidant vitamins
➡️ France turns its back on the US and drops €1.1 billion on a European detection “monster” with 550 km reach
➡️ Day will turn to night during the longest total solar eclipse of the century occurring across regions
➡️ No more duvets in 2026? The chic, comfy and practical alternative taking over French homes
➡️ Seniors behind the wheel: will licenses be pulled automatically after 70 from ?
➡️ Goodbye kitchen cabinets: the cheaper new trend that won’t warp, swell, or go mouldy over time
For these seats, mix a few drops of mild soap into warm water and lightly dampen a soft cloth. Wipe the seats in smooth, overlapping strokes, paying attention to creases where dust and sweat collect. Avoid soaking seams or perforations. Then, go over everything again with a clean, damp cloth to remove any trace of soap.
Once dry, a leather conditioner steps in like a moisturizer after a long day in the sun. You massage it in gently, following the natural lines of the seat. As it absorbs, you can almost see the leather sigh in relief, darkening slightly, regaining its suppleness. No vinegar tang, no chalky residue—just a quiet reset.
Letting the Car Breathe Again
There’s a moment, when you’re finished, that feels almost ceremonial. You step back from the open doors, let the air move through the cabin, and listen. The fabric is no longer tacky. The seats look somehow lighter. The car smells like almost nothing at all—maybe a hint of clean water and sun-warmed fibers. It’s the smell of absence: no sour vinegar, no artificial perfume trying to mask reality.
As the seats dry, fibers rise slightly, regaining their softness. Those coffee halos have faded into the background. The sticky patch from the summer chocolate is a memory now, not a texture under your fingertips. Your car interior doesn’t feel like a problem anymore; it feels like a place again—a small, moving room that holds your mornings, your late-night drives, your in-between moments.
And you did it without the burn of vinegar in your nose or baking soda dust in the air. Just warm water, gentle soap, patient hands, and the quiet decision to care for the object that carries your days.
FaQ
Can I really clean tough stains without vinegar or baking soda?
Yes. A mild detergent and warm water, combined with careful agitation and proper rinsing, can remove most stains. Vinegar and baking soda are popular, but they’re not mandatory—and they can be too harsh or leave residue if misused.
How long will it take for my car seats to dry?
Typically, fabric seats take 2–6 hours to dry, depending on ventilation, humidity, and how much water you used. Keep doors or windows slightly open in a safe space, or run the car’s fan on low to speed things up.
Will this method work on really old stains?
Old stains are more stubborn, but they often lighten significantly with repeated gentle cleanings. Even if they don’t disappear completely, you can usually remove the odor, stickiness, and most of the discoloration.
Is dish soap safe for all car seat fabrics?
Mild, dye-free, fragrance-light dish soap is generally safe for most fabrics when diluted properly. Always test a small, hidden area first to ensure there’s no discoloration or texture change.
How often should I deep clean my car seats?
For daily-use vehicles, a thorough clean every 3–4 months is usually enough, with quick spot-cleaning as spills happen. If you have kids, pets, or long commutes with food and drinks, you may want to clean a bit more frequently.
What if my seats still smell after cleaning?
If odors linger, the foam beneath the fabric may have absorbed the spill. Repeat the gentle cleaning and allow extra drying time with good airflow. Avoid masking smells with strong fragrances; focus on removing the source with mild soap and water.
Can I use this method on car seat belts too?
Yes, with care. Lightly mist the belt, use a damp cloth with mild soap to wipe, then go over with a clean damp cloth to rinse. Avoid soaking the belt or hardware, and let it dry fully before retracting.